- Setting up Jersey project on Spring Boot using Gradle build system.
- Testing a basic welcome GET API.
We had tested or used following tools and technologies in this project:
- Jersey (v 2.21)
- Gradle Build System (v 2.9)
- Spring Boot (v 1.3)
- Java (v 1.8)
- Eclipse IDE on Mac
Spring Boot with embedded tomcat server will run restful Web API application.
A basic Spring Boot Java application has following directories and files:
 Spring Boot Gradle Basic Project Structure
Prerequisite for this Guide:
(a) This guide is expecting you to have Gradle tool installed on your system and gradle command is available on PATH so we can use it at any directory on terminal. Refer Gradle for installation instruction.
(b) Understanding Spring Boot Maven and Gradle build support will be required to know how dependency management work. Spring Boot provides several out of box starter POM, which developer can use to build application in certain technology stack. It helps in reducing the boilerplate code in build file. For our application we will be using Jersey starter POM in our gradle build.
You can also start with cloning https://github.com/geekmj/jersey-jax-rs-examples.git git repository. This git repository is companion project for all Jersey related guides on this website. Click here to visit Github Project Home.
Understand Gradle Build file
File: build.gradle
buildscript {
    ext {
        springBootVersion = '1.2.5.RELEASE'
    }
    repositories {
        mavenCentral()
    }
    dependencies {
        classpath("org.springframework.boot:spring-boot-gradle-plugin:${springBootVersion}")
        classpath("io.spring.gradle:dependency-management-plugin:0.5.2.RELEASE")
    }
}

apply plugin: 'java'
apply plugin: 'eclipse'
apply plugin: 'idea'
apply plugin: 'spring-boot'
apply plugin: 'io.spring.dependency-management'

jar {
    baseName = 'jersey.starter-guide'
    version = '0.0.1-SNAPSHOT'
}
sourceCompatibility = 1.8
targetCompatibility = 1.8

repositories {
    mavenCentral()
}

dependencies {
    compile("org.springframework.boot:spring-boot-starter-jersey")
    testCompile("org.springframework.boot:spring-boot-starter-test")
}

eclipse {
    classpath {
         containers.remove('org.eclipse.jdt.launching.JRE_CONTAINER')
         containers 'org.eclipse.jdt.launching.JRE_CONTAINER/org.eclipse.jdt.internal.debug.ui.launcher.StandardVMType/JavaSE-1.8'
    }
}

task wrapper(type: Wrapper) {
    gradleVersion = '2.6'
}
We currently require only one dependency for our guide project compile("org.springframework.boot:spring-boot-starter-jersey"). In future we will introduce many more dependencies.
Opening Spring Boot + Jersey + Gradle project in Eclipse IDE
Lets open the cloned “Jersey JAX-RS examples” project in Eclipse IDE.
Step 1: Install Eclipse Gradle Plugin from Eclipse Marketplace
Go to menu Help > Eclipse Marketplace…
Search for gradle and install Gradle Integration for Eclipse Plugin

Step 2: Open Eclipse Import Menu
 Eclipse import Project Menu
Step 3: Select Gradle Project

Step 4: Browse project folder, build model and select a project

On click of finish, Gradle will fetch all the dependency and project will be added in Eclipse IDE workspace.
Spring Boot Jersey(JAX-RS) Configuration
Create a bean ( @Bean ) of type ResourceConfig where we can register all of Jersey Restful endpoints.
Tip: In Jersey Endpoint definition class are normally called Resource. Class name usually is XyzResource.
File: JerseyConfig.java
package in.geekmj.jersey.config;
import org.springframework.stereotype.Component;

import org.glassfish.jersey.server.ResourceConfig;

@Component
public class JerseyConfig extends ResourceConfig{

	/**
	 * In constructor we can define Jersey Resources & Other Components
	 */
	public JerseyConfig() {
        // register(XyzResource.class);
    }
}
Resource (Endpoint) Definition
A Jersey Resource (Endpoint) class should have @Component annotation. Doing so we can inject bean and values managed by Spring.
File: HelloWorldResource.java
package in.geekmj.jersey.resource;
import javax.ws.rs.GET;
import javax.ws.rs.Path;
import javax.ws.rs.Produces;
import javax.ws.rs.core.MediaType;
import org.springframework.stereotype.Component;
/*
* Root resource (exposed at "/api/helloworld" path)
*/
@Component
@Path("/api/helloworld")
public class HelloWorldResource {
/*
* Method handling HTTP GET requests. The returned object will be sent
* to the client as "text/plain" media type.
*
* @return String that will be returned as a text/plain response.
*/
@GET
@Produces(MediaType.TEXT_PLAIN)
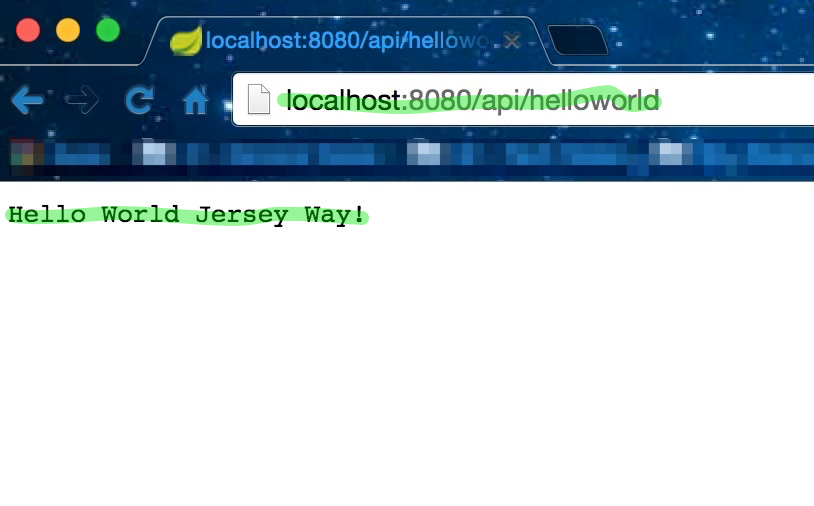
public String helloMessage() {
return "Hello World Jersey Way!";
}
}
We have to register this class in JerseyConfig Class. Changed JerseyConfig class is given below:
File: JerseyConfig.java (modified)
package in.geekmj.jersey.config;

import org.glassfish.jersey.server.ResourceConfig;
import org.springframework.stereotype.Component;

import in.geekmj.jersey.resource.HelloWorldResource;

@Component
public class JerseyConfig extends ResourceConfig {

	/*
	 * In constructor we can define Jersey Resources & Other Components
	 */
	public JerseyConfig() {
		register(HelloWorldResource.class);
	}
}
Running & Testing Application
We can run Spring Boot application as we run a simple Java program from Eclipse (Make sure gradle had pulled all the dependencies of the project, Using gradle plugin provide you menu to do the same, or we may can use gradle build command). We can also use gradle task gradle bootRun to run the application.

On Successful Run in console we will see something like below:

We will now test the API endpoint https://localhost:8080/api/helloworld by accessing in browser:
Tip: For testing REST API we should use Rest Client like Postman (Chrome Plugin) or other tools.
Concepts & Configurations
(a) Jersey URL Mapping: Spring Boot register a Jersey servlet and map it to /* path be default. We may change this default mapping to something else by providing @ApplicationPath in JerseyConfig.java (i.e. Spring ResourceConfig).
File: JerseyConfig.java
package in.geekmj.jersey.config;

import javax.ws.rs.ApplicationPath;

import org.glassfish.jersey.server.ResourceConfig;
import org.springframework.stereotype.Component;

import in.geekmj.jersey.resource.HelloWorldResource;

@Component
@ApplicationPath("/api")
public class JerseyConfig extends ResourceConfig {

	/*
	 * In constructor we can define Jersey Resources & Other Components
	 */
	public JerseyConfig() {
		register(HelloWorldResource.class);
	}
}
After this change https://localhost:8080/api/helloworld will be accessed at https://localhost:8080/api/api/helloworld
(b) Jersey Servlet Setup: By default Spring Boot setup Jersey as Servlet to cater the API request. Jersey will be set up as a Servlet in a @Bean of type ServletRegistrationBean named jerseyServletRegistration. We may can disable and override this servlet bean by creating servlet with same name.
(c) Jersey Filter Setup: We may can use Filter rather than servlet to cater the API request. Make an entry in application.properties file.
File: application.properties
spring.jersey.type=filter
Doing so, @Bean can be replaced or override by jerseyFilterRegistration.
(d) Jersey Servlet or Filter init parameter: We can provide init parameters to Jsersey Servlet or Filter in application.properties file.
File: application.properties
spring.jersey.init.parameter1=parameterValue1
(e) Servlet @Order:
File: application.properties
spring.jersey.filter.order=1